Blog
Coconut, Vanilla & Chocolate Layer Cake Recipe
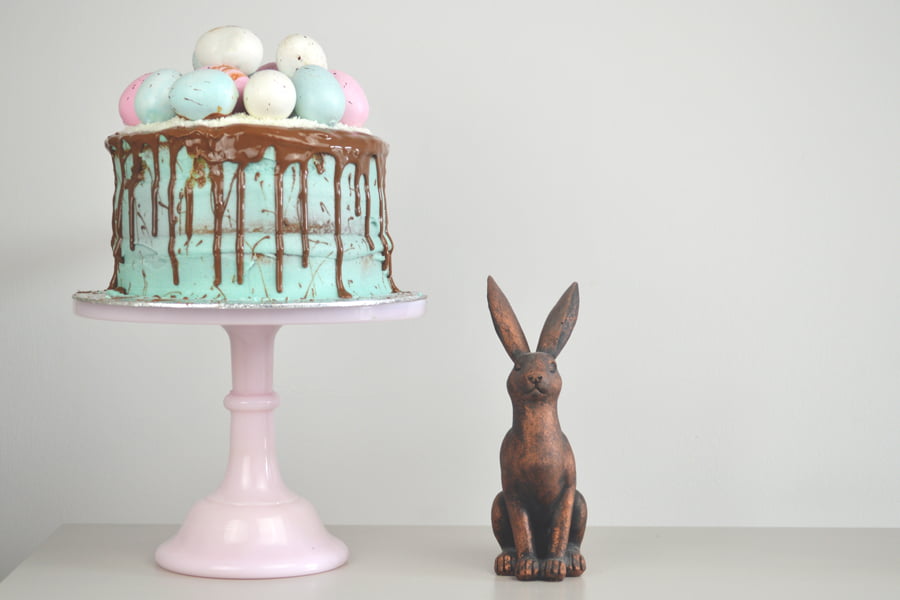
This simple cake recipe has been adapted to create a truly flavoursome treat with a real wow factor! Perfect for spring, the freshness in this cake really is reminiscent of Easter time.
MAKES 1 CAKE // TIME: 2 HOURS 30 MINUTES // MEDIUM
Coconut, Vanilla & Chocolate Layer Cake Ingredients:
For the cake:
- 450g Caster Sugar
- 450g Margarine
- 450g Self Raising Flour
- 9 Eggs
- 150g Classic Milk Chocolate (chopped)
- 75g Desiccated Coconut
- 150ml Coconut Milk
- 1 ½ tsp Vanilla Bean Paste
For the topping:
- Blue Food Colouring
- 250g Salted Butter (Softened)
- 500g Icing Sugar
- 50-100ml Coconut Milk
- 100g Desiccated Coconut
- 100g Classic Milk Chocolate
Coconut, Vanilla & Chocolate Layer Cake Method:
- Start by making the cakes. You may want to make this in three batches for the three layers; in this case, just divide the ingredients by 3. Use an electric mixer to combine the sugar and margarine.
- Add the eggs, coconut milk, and vanilla bean paste. Mix with an electric mixer until all combined.
- Add in the flour and mix using a spoon. Then, add in your chocolate and desiccated coconut and stir until all combined.
- Preheat your oven to 170 degrees c. Line and grease 3 cake tins (around 15-20cm wide). Divide equally into the tins, and allow to bake in the oven for 25-30 minutes.
- Whilst your cakes are baking, make the buttercream. Add the butter to a bowl, and gradually add the icing sugar, mixing with an electric mixer until completely combined. Slowly add the coconut milk whilst mixing; just enough to make the consistency a firm but spreadable topping. Then, add a small drop of blue food colouring; just enough to make a duck-egg blue colour.
- Remove the cakes from the oven, and allow to cool on a wire rack.
- Once cool, layer up the cakes by topping them with buttercream and a sprinkle of coconut. Once all three layers are done, use the remaining buttercream to cover the rest of the cake. Use a metal spatula to get the sides really smooth; a turn table also helps! When covered, pop the cake into the fridge so that the buttercream hardens a little.
- Melt the milk chocolate in a bowl using short bursts in the microwave. Remove the cake from the fridge, and once ready, you can create speckles by flicking the chocolate onto the cake. We also did a drip down the sides by popping some of the melted chocolate in a piping bag, snipping of a tiny bit of the corner, and dripping the chocolate around the edge of the cake. But decoration should be the fun part – so decorate your cake however you want! We added some egg decorations for Easter – but you could add more coconut, or even pipe on the top. Go crazy!
- When ready, you might want to pop the cake back in the fridge to set. Then, just enjoy!